Link Building Campaign Tips
Understanding the basics behind link building is a pretty straightforward task. We created a beginner tutorial for a link building campaign for free in the past. But, a lot of the methods featured in that article require manual work or are limited. If you want the most efficient methods, you can follow the link building campaign tips from this article. Keep in mind, you will need to buy some tools.
Putting together an efficient campaign can actually take a lot of trials and errors. You need to try a lot of different techniques and see which ones work best. If you have the blueprint of a successful campaign, you can save a lot of time. We played with a lot of different tools and methods for our campaigns and refined the process over and over again for the last few years.
The following tips that we’ll highlight in this article represent one of the most efficient ways of running a link building campaign. This blueprint can save you a countless amount of time, as long as you’re willing to spend some money.
Prospect Research
In our free tutorial, we showed you how to find good sites by using Google and SEOquake. They are good for beginners but, if your focus is on speed you should get a pro tool like Ahrefs. By using Ahrefs, you can find a large number of sites but you can also filter them based on SEO metrics instantly. The tool starts at $99/month.
With Ahrefs you can find new sites either by doing competitor research or by using the content explorer. The content explorer allows you to make searches just like in Google but you can furthermore filter all of the results by SEO metrics.
Content Explorer
You can use classic Google commands like [keyword/niche] “submit a guest post”, [keyword/niche] “guest post by” to get results, as well as general terms like “smartphone reviews” or “smartphone news.” Moreover, you can use Ahrefs-specific commands like “AND”, “OR.” You can use a command built like this one:
([keyword 1] OR [keyword 2]) AND ([keyword 3] OR [keyword 4])
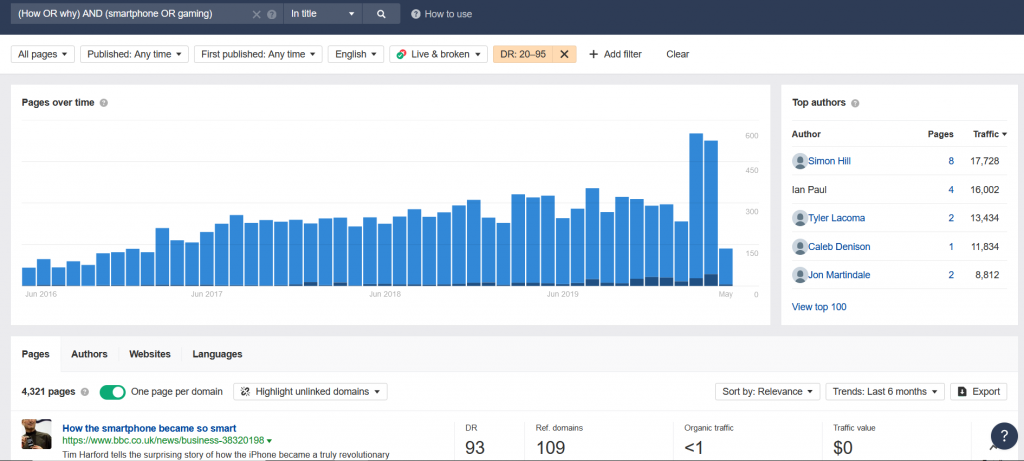
For example, you can search “(How OR why) AND (smartphone OR gaming).” This will give you all of the pages that feature one of the four potential word combinations.
Even if any of the searches mentioned above will give you thousands of results, the real time-saving component of Ahrefs is in the filters. The essential filters are:

Search Location: is the first filter that you’ll encounter, even before displaying any results. You can tell the content explorer to display results that contain your keyphrase everywhere, in the title, in content, or in the URL. The “everywhere” feature will show all of the results while “in title” will only show the most qualified ones.
Language: The content explorer will display web pages in all languages initially. You’re probably not looking for this so you can easily use the language feature to display results only from English websites, for example.
Domain Rating: This filter alone is a reason to buy Ahrefs. If you’re building links, you probably know that quality comes first. The domain rating filter will only display the results that have the minimum DR chose by you. We recommend using the DR 20-95 range for this.
One Page Per Domain: The content explorer does not display websites but web pages, and this means that duplicates will occur. You’re probably interested in finding unique domains so make sure to toggle this check one. You might also want to perform an extra duplicate check externally because some sites might slip through the cracks sometimes.
Live & Broken: The tool displays both live and broken web pages. If you’re doing a broken link building campaign you will want to toggle the “broken” feature on. A broken web page does not mean a broken website so don’t toggle the only “live” feature on if you’re looking to find domain names.
These are the essential filters but, there are a bunch more like “referring domains,” “organic traffic,” “traffic value,” and a few others.
Considering that you’re interested in finding blogs and news sites, you will probably also want to go through all of the results and check them manually. A lot of businesses also have a blog page and might end up being displayed in these search results. This is the only time-consuming part of our link building campaign process but the rest of the tips make up for it.
Competitor Research
Content explorer will give you more results than you’ll know what to do with since you can export up to 50K rows a month on the cheapest plan. But, the idea behind competitor research is that you’ll get more qualified sites since they have been used by your competitors. If they were able to get a link from that site, then your chances are probably high too.

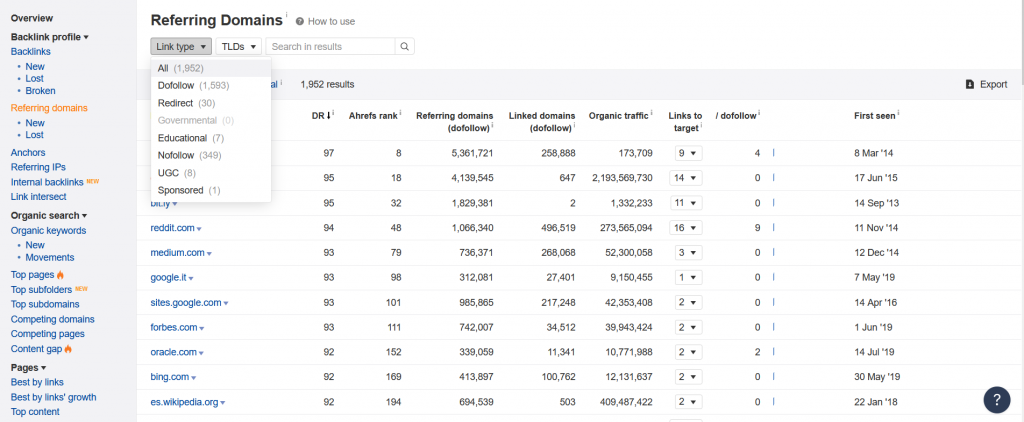
You can run a search in the site explorer on any of your competitors and go to the referring domains tab and have access to their whole link profile. Unfortunately, you can only filter the results based on link type like “dofollow,” “nofollow,” “UGC,” and by TLD like .com, .net.
You can’t filter the results based on DR but you can order them by DR and look at the pages that have domains with a score over 20 and only export those. The results will still need a lot of manual attention and filtering but you can still find a few worthwhile results.
Contact Information
If you want to automate and speed up the process you can’t perform a manual search for contact details since the process will take an eternity, especially when you work with hundreds of sites. To get the contact info, we’ll be using a paid tool like Hunter – it starts at $50 for 1000 results.
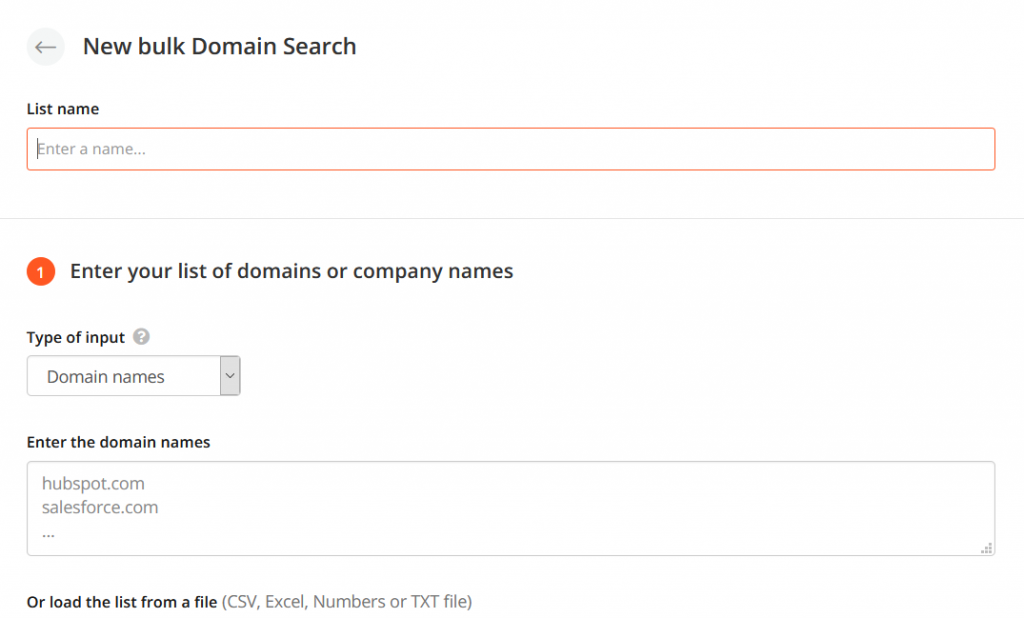
The benefit of using something automated like Hunter.io is that you can run a bulk search on all of your sites. Just upload your list of sites, play with the filters, and Hunter will deliver you a CSV file with valid email addresses for most sites. You can choose to get a single address per site or multiple ones.

Furthermore, you can check to see if the email addresses are deliverable with Hunter or a tool like Neverbounce. This can save you some time but it will cost extra.
Outreach
If you followed our tips, your link building campaign is almost done, you only need to send out the emails. The best way to do this is by using a paid tool like GMass or Mailshake. GMass is pretty straightforward, it costs only $13 and has unlimited use. It’s simple, with few features but it gets the job done.
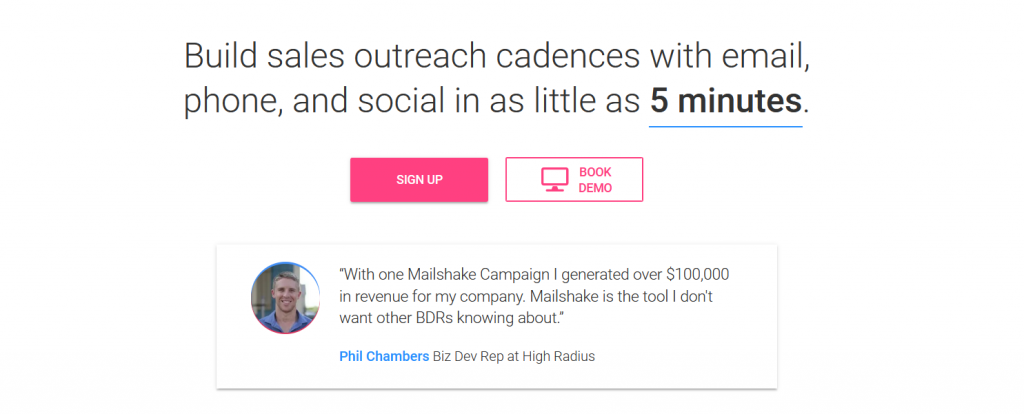
Although Mailshake costs $60, it has a lot more features that both speed up things but also increase your closing rate. You only need to set up an email campaign with a custom subject line and body text. Upload a spreadsheet with sites and emails whenever you want. If you get a new list, you don’t need to create a new campaign.
You can also create a calendar so it sends out emails every few minutes rather than all at once. This can be useful since it will signal the email server that you’re not spam. Talking about spam, Mailshake also has a live spam check for your email text so it helps you stay away from negative phrases that can hurt your numbers.

If you send a lot of emails that don’t get opens, have huge bounce rates, or arrive directly in spam, your email address will be hurt. The more of these negative signals you send out, the more Gmail will place your email directly in the spam or the promotions tab. That’s something you want to stay away from since it hurts conversions.
Once you click send, the emails are out and you can get ready for replies.
Conclusion
Running a link building campaign is not as hard as it seems but it can be time-consuming if you don’t use the pro tips that we mentioned above. If you value time, using our blueprint can potentially save you dozens of hours. The all-around cost for these is under $200/month but it can be worth it if you want to take your campaigns to the next level.